
How to Install Living Walls: Step-by-Step Guide for Iowa
TL;DR:
- Successful indoor living walls in Iowa require careful site assessment including light and structural capacity.
- Modular and hydroponic systems with tropical plants are best suited for Iowa’s indoor winter conditions.
- Regular maintenance of irrigation, lighting, and plant health is essential for long-term success.
Iowa interiors face a real tension: winters are long, indoor air gets dry, and most walls just sit there doing nothing. A living wall changes all of that. It brings greenery, texture, and measurable air quality benefits into spaces that would otherwise feel flat. But installing one successfully takes more than buying a kit and hanging a frame. Light requirements, irrigation setup, structural load, and plant selection all need to match your specific site. This guide walks you through every stage, from initial site check to long-term care, so your living wall looks exceptional from day one and stays that way.
Table of Contents
- Assessing your space and choosing the right living wall system
- Gathering materials, tools, and preparing your site
- Installation steps: How to build your living wall
- Maintenance, troubleshooting, and ensuring long-term success
- Expert take: What most guides miss about living walls in Iowa
- Ready to create a living wall? Next steps for Iowa homes and businesses
- Frequently asked questions
Key Takeaways
| Point | Details |
|---|---|
| Site suitability is key | Proper assessment of light, structure, and access is critical to a successful living wall. |
| Choose the right system | Modular and hydroponic setups are ideal for Iowa homes and commercial interiors. |
| Maintenance matters | Regular care and proper setup reduce costs and plant failure rates. |
| Professional help pays off | Engaging local experts can prevent costly mistakes and maximize biophilic benefits. |
Assessing your space and choosing the right living wall system
Before you order a single panel or plug, spend time honestly evaluating your wall. Not every space is a good candidate, and skipping this step is the most common reason living walls fail within the first year.
Start with light. Most tropical plants need at least 100 to 200 foot-candles of consistent light. Hold a light meter up to your chosen wall at different times of day. If natural light falls below that threshold, plan for supplemental grow lights from day one. Iowa’s winter months, with their short, gray days, make grow lights a near-universal requirement for any north-facing or interior wall.
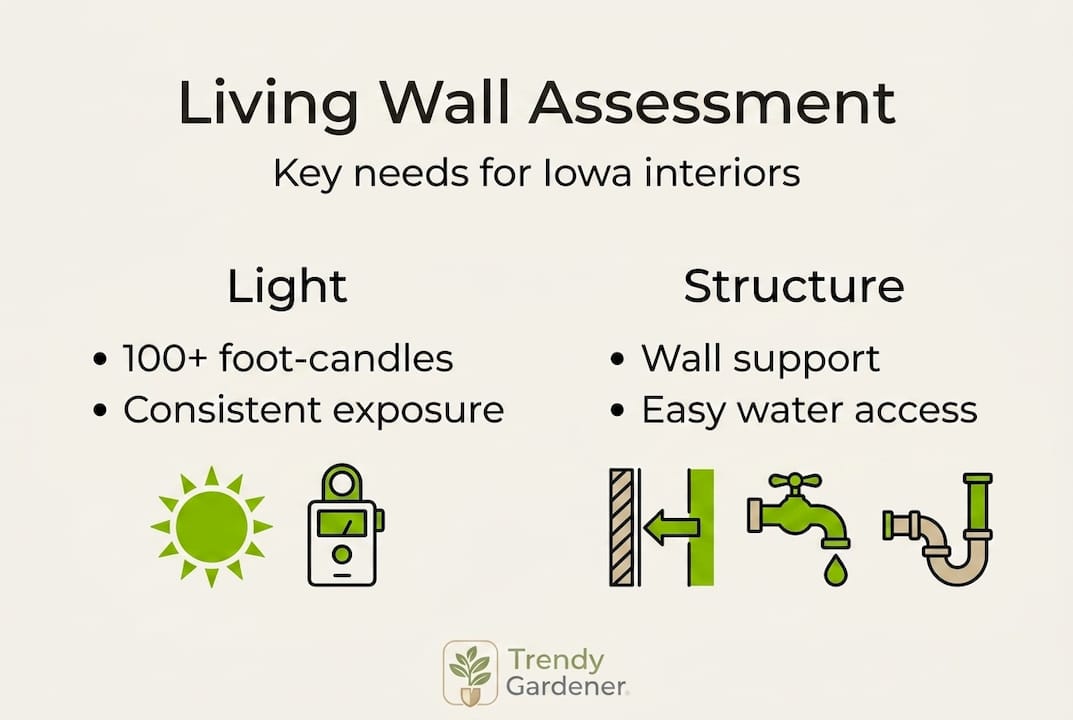
Next, check structural capacity. Living walls require support for 5 to 20 lbs per square foot depending on the system, substrate, and water saturation. A large hydroponic wall on a standard drywall partition is a structural risk. You need studs, masonry, or a dedicated subframe.
Understanding living wall basics will also help you match the right system to your goals. Here is a quick comparison of the main system types:
| System type | Best for | Relative cost | Maintenance level |
|---|---|---|---|
| Modular panels | Residential, easy installs | Moderate | Low to moderate |
| Tray-based | Mid-scale commercial | Moderate | Moderate |
| Felt/geotextile pockets | Budget DIY, small walls | Low | High |
| Hydroponic | Large or commercial walls | High | Low (when dialed in) |
| Potted rack | Rentals, flexible layouts | Low to moderate | Moderate |
For Iowa interiors, a comparison of living wall types shows modular and hydroponic systems consistently outperform felt pockets in humid winter environments, where moisture management is critical.
When it comes to plants, tropical houseplants and low-light species perform best indoors in Iowa. Think pothos, philodendron, peace lily, and ZZ plant. These tolerate the lower humidity of heated Iowa spaces far better than ferns or orchids.
The living wall health benefits alone make the upfront assessment worth the effort. A wall that survives and thrives delivers those benefits for years.
Pro Tip: Start with a 4 to 6 square foot modular test panel before committing to a full wall. Run it for 60 days, track plant health, and adjust your irrigation and lighting before scaling up.
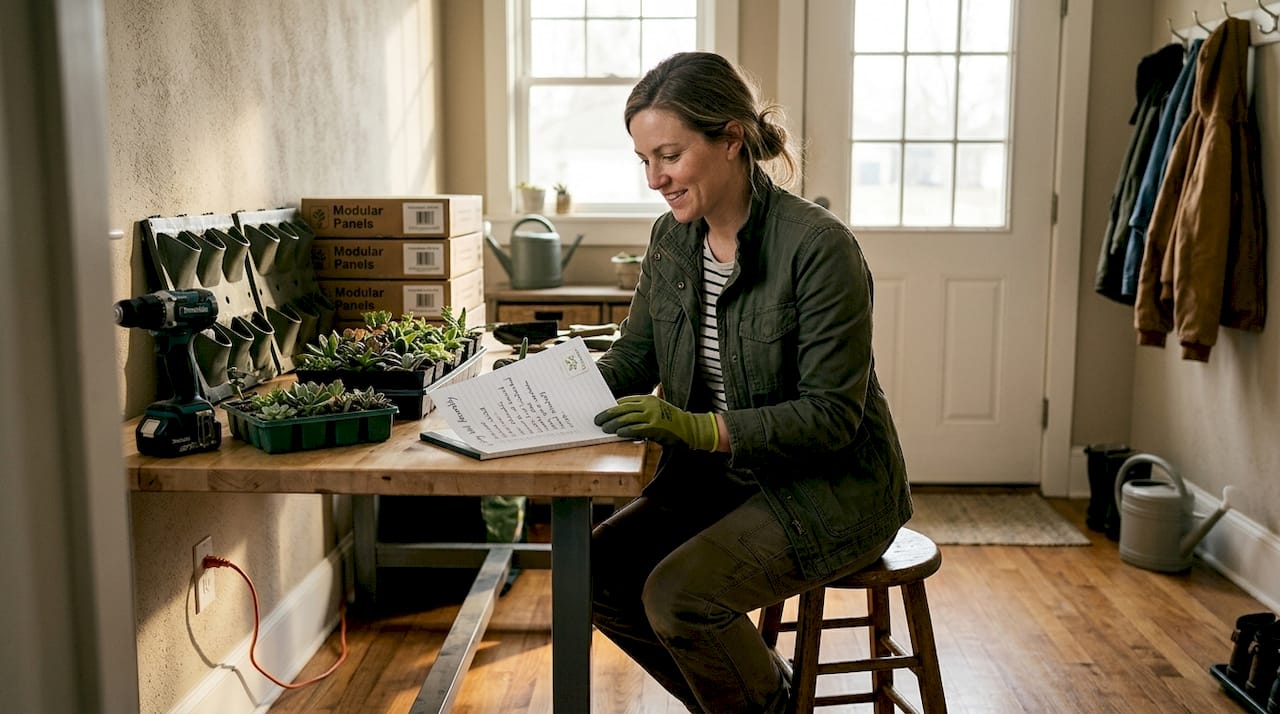
Gathering materials, tools, and preparing your site
With your system and site selected, the real prep begins. Missing even one item on your materials list mid-installation can cause delays that stress your plants and compromise your wall.
Here is a complete materials and tools reference:
| Category | Items needed | |—|—|—| | Structural | Lag bolts, masonry anchors, stud finder, level | | Waterproofing | Pond liner or HDPE membrane, waterproof sealant, drip tray | | Irrigation | Drip tubing, micro-emitters, timer, reservoir or direct line | | Planting | Plant plugs or 4-inch pots, growing media, nutrient solution | | Mounting | Wall brackets, subframe lumber or aluminum channel, screws | | Tools | Drill, hole saw, tape measure, utility knife, adjustable wrench |
Before any drilling starts, run through this site prep checklist:
- Confirm wall surface type: drywall, masonry, or tile.
- Locate and mark all studs or anchor points.
- Check for electrical wiring or plumbing behind the wall using a stud finder with AC detection.
- Test for surface moisture with a moisture meter. Any reading above 15% means you need to address the source before mounting.
- Verify access to a water line and nearby electrical outlet for the irrigation timer and grow lights.
- Confirm wall surface temperature stays above 60°F even in Iowa’s coldest months, since exterior-adjacent walls can get cold enough to harm roots.
Do not anchor into drywall alone. Every bracket and subframe connection must hit a stud or masonry. DIY installation costs about $100 per square foot, and rework from a failed anchor can push that well past the professional rate.
For design inspiration for Iowa sites, look at lobby and reception installs where irrigation access and lighting were baked into the design from the start. That forward planning is what separates a wall that lasts from one that needs replacement in 18 months.
If the project scope feels large, connecting with local Iowa living wall experts early saves time and often reduces overall cost.
Pro Tip: Stage your plants and run your irrigation system on the floor for 48 hours before mounting. Catch drips, clogs, or timer issues before they become wall damage.
Installation steps: How to build your living wall
With materials ready and the site prepared, it is time to bring your living wall to life with a systematic approach.
Follow these steps in order:
- Mark anchor points. Use a level and pencil to mark every stud or masonry anchor location. Snap a chalk line across the top to keep the frame square.
- Install the waterproof membrane. Cut your pond liner or HDPE sheet to size and secure it behind the frame zone. Overlap seams by at least 4 inches and seal edges with waterproof tape.
- Mount the subframe. Attach your aluminum channel or lumber subframe to the marked anchor points. Check for level in both directions before tightening fully.
- Fit irrigation lines. Run your drip tubing along the top of the frame. Space micro-emitters to cover every planting zone. Connect to your timer and test with water before adding plants.
- Pre-populate containers or slots. Fill pockets or modules with growing media before mounting. This is easier off the wall and reduces mess during install.
- Insert and arrange plants. Start at the top and work down. Stagger plant sizes and leaf textures for visual depth. Keep root balls compact and avoid forcing them into undersized slots.
A quick comparison of installation approaches:
| System | Avg. DIY time (home) | Avg. professional time (commercial) |
|---|---|---|
| Modular panels | 4 to 8 hours | 1 to 2 days |
| Hydroponic | 8 to 16 hours | 2 to 4 days |
| Potted rack | 2 to 4 hours | Half to 1 day |
The installation process covering frame mounting, waterproofing, irrigation, and plant insertion is well documented, but the steps that most people rush are waterproofing and irrigation testing. A crooked frame can be corrected. A slow leak behind a finished wall is a much bigger problem.
For a low-failure design approach that accounts for Iowa’s interior conditions specifically, plan your lighting zones and irrigation zones before your plant selection, not after.
For larger commercial builds, working with Iowa living wall professionals means you get engineered irrigation, code-compliant anchoring, and a plant guarantee.
Maintenance, troubleshooting, and ensuring long-term success
Even a stunning, newly installed wall needs consistent care. This is where most DIY projects quietly fall apart.
Here are the core maintenance tasks to stay on top of:
- Weekly: Check irrigation emitters for clogs, inspect for pests (look under leaves), and remove any yellowing or dead plant material.
- Bi-weekly: Add liquid fertilizer at half strength to your irrigation reservoir.
- Monthly: Prune back fast-growing plants like pothos to keep the wall balanced. Check grow light bulb output and replace as needed.
- Seasonally: Audit every plant slot. Replace any failed plants before neighbors fill the gap with root sprawl.
Troubleshooting quick reference:
- Yellowing leaves usually mean overwatering or low light. Check your timer settings and foot-candle readings.
- Root rot signals too much moisture retention. Improve drainage or switch to a substrate with better aeration.
- Water staining on the wall means your drip tray is overflowing. Reduce irrigation duration or increase drain line diameter.
According to research on biophilic design, living walls can boost productivity by up to 15% and cool spaces noticeably, while also improving perceived air quality for occupants.
Expert plant care cuts plant loss by 30% in living walls, with hydroponic systems showing better long-term plant retention when irrigation and lighting are properly dialed in. Geotextile and modular panels support healthier root zones when maintained consistently.
For Iowa specifically, winter is the season to watch. Supplement with grow lights, run a humidifier nearby if interior humidity drops below 40%, and check on your measured living wall benefits to stay motivated through the maintenance routine.
The Des Moines Botanical Garden’s living wall is a local example worth studying. Their maintenance approach prioritizes irrigation reliability over plant variety, which is the right call for Iowa’s conditions.
Pro Tip: Use a moisture meter instead of guessing, and set monthly calendar reminders for fertilizing and plant audits. Consistency is what separates a wall that thrives from one that slowly declines.
Expert take: What most guides miss about living walls in Iowa
Most step-by-step guides treat living walls as a universal project. They are not. Iowa’s indoor conditions, with low winter humidity, limited natural light from November through February, and wide temperature swings near exterior walls, create failure points that standard guides skip entirely.
The biggest mistake we see from DIYers is underestimating irrigation complexity. A drip timer that works fine in September may waterlog plants in January when the heating system drops indoor humidity and plants slow their uptake. Irrigation needs seasonal adjustment, not a set-and-forget mindset.
Light is the second blind spot. Most homeowners do not realize how dramatically their south-facing window output drops in winter. Without supplemental lighting, even low-light plants begin to decline by January.
For commercial clients, professional installation is highly recommended for anything over 20 square feet. The engineering, warranty, and plant guarantee alone justify the cost. For homeowners, starting small with expert guidance is the most reliable path to a wall you will actually love in year two.
Here is a contrarian view worth considering: a modest, well-maintained 12 square foot wall with reliable low-light species will outperform a dramatic 60 square foot showpiece that requires constant intervention. Scale to your actual maintenance capacity, not your Pinterest board.
Ready to create a living wall? Next steps for Iowa homes and businesses
You now have a solid foundation for assessing, building, and maintaining a living wall that works for Iowa’s specific conditions.
Trendy Gardener offers customizable solutions for every scale, from a simple easy-install living wall kit for homeowners ready to start small, to a fully plumbed recirculating wall system built for commercial lobbies, offices, and retail spaces. Every product we carry is selected for real-world reliability, not just visual impact. If you want expert guidance matched to your site, budget, and plant preferences, consult with our Iowa living wall team for a personalized recommendation. We make it easy to move from learning to installing with confidence.
Frequently asked questions
Which living wall system is best for an Iowa home?
Hydroponic and modular systems are the top choices for Iowa homes because they handle indoor climate fluctuations well and require less frequent plant replacement than felt pocket systems.
How much does it cost to install a living wall indoors?
DIY installation runs about $100 per square foot, while hiring a professional typically costs around double that, depending on system complexity and wall size.
What kind of plants work best for indoor living walls in Iowa?
Low-light tropicals like pothos, spider plant, and ivy are ideal because they tolerate Iowa’s dry indoor air and reduced winter light without constant intervention.
Do living walls really improve air quality and productivity?
Yes. Biophilic design research shows living walls can boost productivity by 6 to 15% and improve occupants’ perceived air quality, making them a functional investment as much as a visual one.